

How to operate the workspace platform
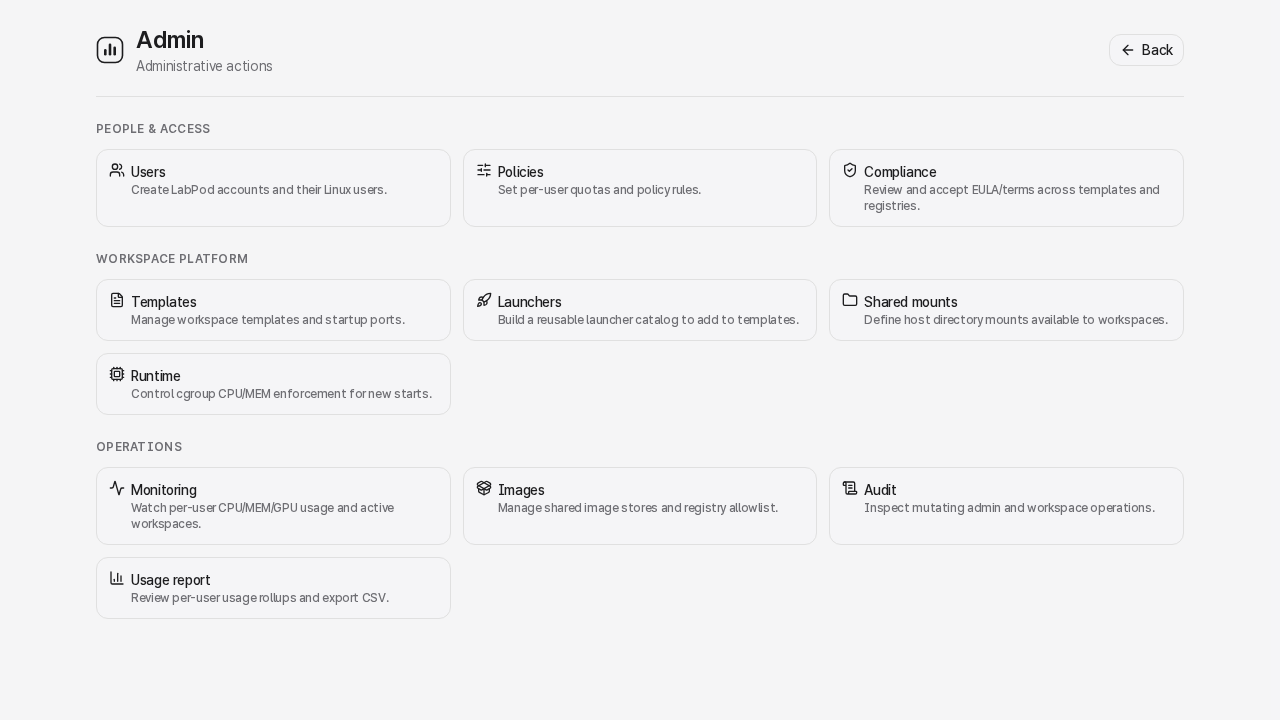
This checklist covers the admin pages that keep a LabPod host usable after installation. Admin work is grouped into four areas, all reachable from a single Overview page: Overview (readiness and attention), People, Workspace templates, and System.
Start from Overview
Section titled “Start from Overview”Open /admin. Its navigation and task groups appear immediately while researcher-readiness
checks continue in the background. The status banner settles on ready or needs attention;
checks that are still running appear as unknown without blocking the rest of the page. Then:
- Needs attention - prioritized problems with an explanation, evidence, and a direct action link. Empty when nothing is actionable.
- Researcher readiness (root only) - the minimum checklist for inviting researchers: an enabled workspace template, provisioning, and other host prerequisites.
- Healthy monitoring - collapsed by default; expand it to see routine checks that are already fine, instead of them crowding out what needs your attention.
A signed-in superuser who isn’t root sees the same page scoped to monitoring: attention items and healthy checks, but no configuration actions. Root-only destinations across People, Workspace templates, and System are simply absent from their view rather than shown disabled.
People: accounts, roles, and limits
Section titled “People: accounts, roles, and limits”Open People (/admin/users, root-only).
- Lab defaults - the CPU/memory/GPU/disk-alert allowance a newly created person starts with. Changing defaults never touches existing people’s limits.
- New user - select this action when you are ready to open the account-creation form. If no
Linux account exists, LabPod provisions one
(
useradd, linger, aworkspaceshome directory); if the username already exists, LabPod uses its recorded passwd HOME and leaves its Linux password unchanged. Set role (Regular or Superuser) and, if this person needs something other than the lab default, override their resource limits at creation time. - Adopt existing Linux accounts - bulk-onboard several pre-existing accounts at once with a temporary LabPod password each; their Linux passwords are never touched.
- Selecting a person shows their profile, per-person resource limits (a pill marks whether they’re on the lab default or a custom override), role, and a collapsed Danger zone for password reset or removing them from LabPod (their Linux account and home always survive - see Users & quotas).
- If a person’s Podman subordinate-ID mapping needs migration, People shows an owner action pill and a read-only status - only that person can run the migration themselves, from their own Settings page. Admins observe; they cannot trigger it.
Resource limits (/admin/policies) is a lab-wide, read-mostly table of the same quotas -
useful for comparing everyone’s limits and usage at a glance. A superuser who isn’t root can view
it; only root can edit.
Workspace templates: images and launchers
Section titled “Workspace templates: images and launchers”Open Workspace templates (/admin/templates, root-only) - see
How to create a global workspace template for the full workflow. In brief:
- The compact catalog shows each workspace template’s primary app, resource defaults, artifact source, and settings; select New workspace template only when you need the creation form.
- Mark one enabled workspace template as the default recommendation so new researchers land on a sensible starting point.
- Technical fields (image tags, commands, ports, mounts, environment, launcher behavior, bundle details) live behind that workspace template’s Advanced toggle.
- Launchers (
/admin/launchers) holds the reusable app catalog. Select New launcher to open its creation form.
Add a shared mount
Section titled “Add a shared mount”Shared mounts are grouped under System. Use them for datasets, model weights, course files, or a shared scratch area.
- Create the host directory and set ownership/permissions outside LabPod.
- Open Shared mounts (
/admin/shared-mounts, root-only). - Click New shared mount.
- Set Name, Host path, and Container path.
- Leave Read-only enabled for datasets and model weights.
- Save.
The mount is offered to new workspaces. Running workspaces need a stop/start before changed mounts are applied.
To restrict which host paths admins can configure, set LABPOD_SHARED_MOUNT_ROOTS in
/etc/labpod/labpod.env and restart labpod.service.
Tune System settings
Section titled “Tune System settings”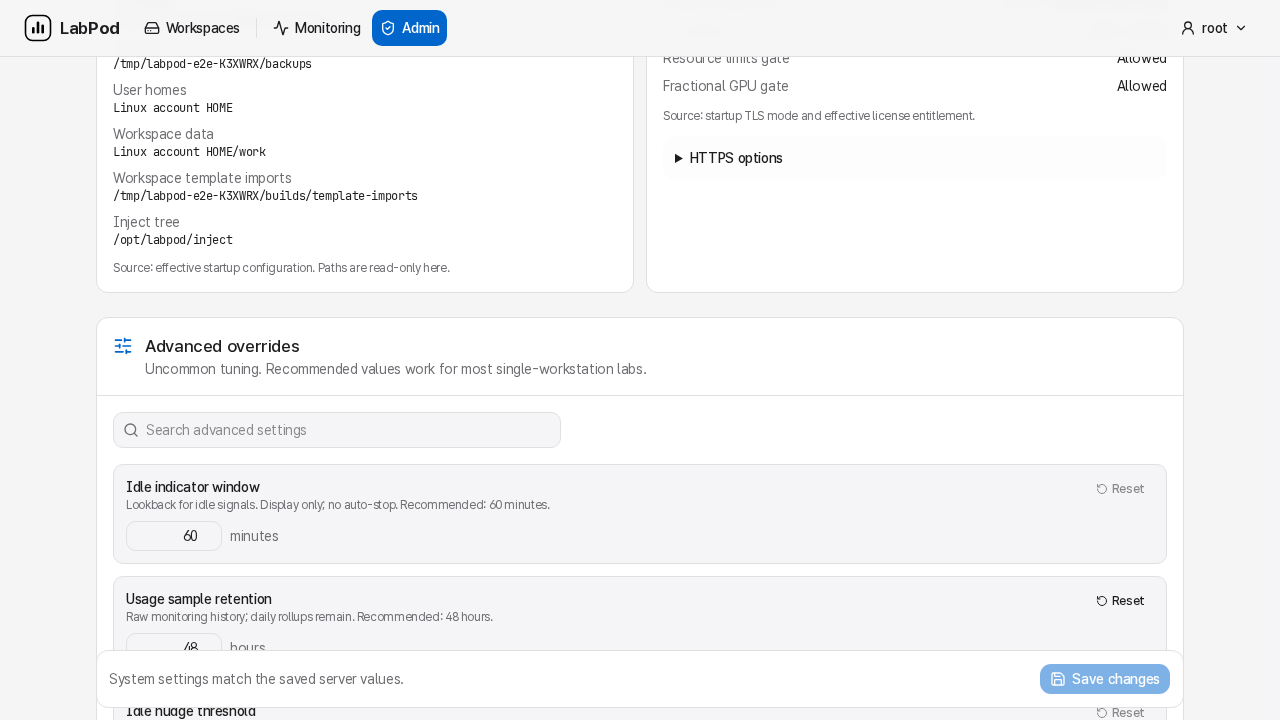
Open System (/admin/runtime, root-only). It’s organized into four parts:
- Common settings - the handful of choices most labs actually change: the server’s display name, whether CPU/memory cgroup limits are enforced for new starts, and whether fractional GPU sharing is offered. Each toggle shows an Effective/Not effective pill and, when ineffective, the exact reason (missing license, unsupported cgroup mode, no detected HAMi/MIG support).
- Detected capabilities - read-only facts LabPod derived from the host: GPU inventory and source, cgroup mode, resource-limit and fractional-GPU effectiveness, storage/runtime paths, TLS mode, and license state. Change the host or license prerequisite, not these values directly.
- Advanced overrides - a searchable, individually resettable set of uncommon tuning knobs (idle indicator window, usage sample retention, idle nudge threshold, session retention, audit-log retention, upload caps, file-operation concurrency). Recommended values work for most single-workstation labs; each has its own Reset back to that recommendation.
- Maintenance - links to Software update, detailed Monitoring, Audit log, and License, plus a
reminder that backup is a browser download or
labpod admin backup, and restore is an offline CLI operation by design.
Under Connection and license, expand HTTPS options for the supported deployment choices. HTTP remains the default for a restricted, trusted LAN. Operator-provided or self-signed HTTPS encrypts browser traffic; a self-signed certificate still produces a browser trust warning on first visit.
Changes here take effect without a server restart. Running workspaces keep the settings they started with; stop and start a workspace to apply a changed CPU/memory or GPU-sharing setting to it.
Monitor usage and audit changes
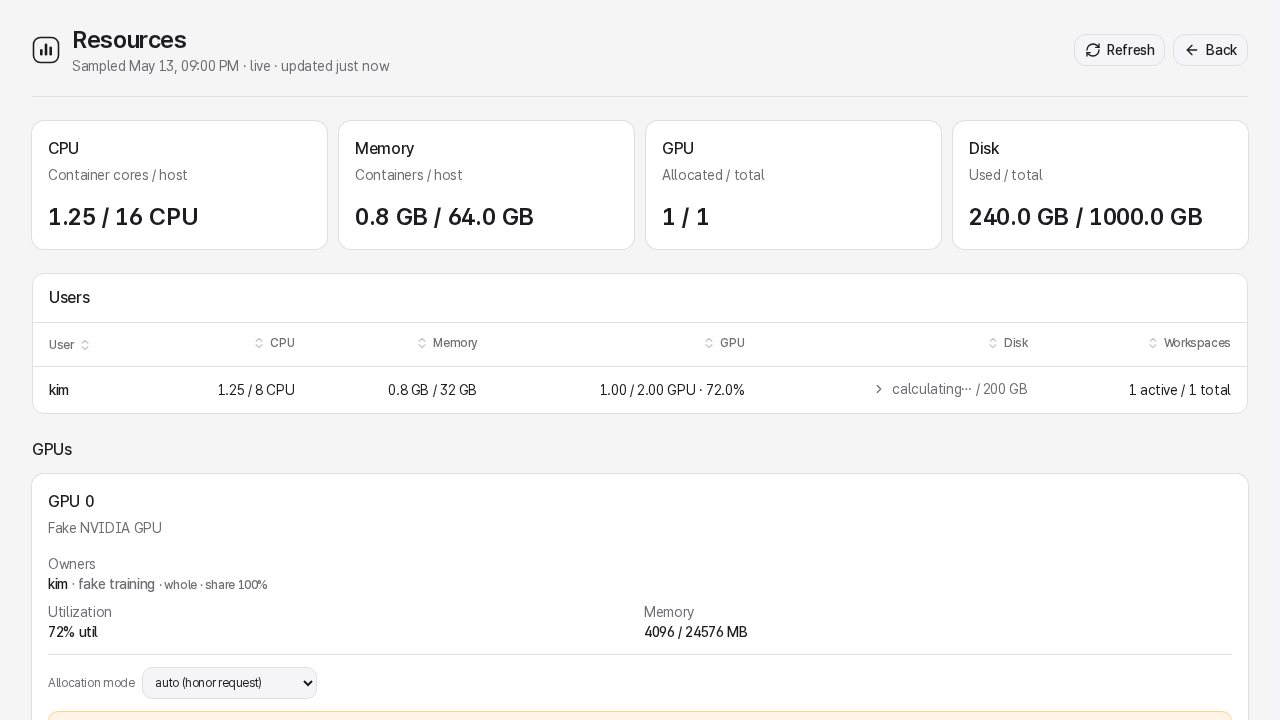
Section titled “Monitor usage and audit changes”Use Monitoring (/admin/resources, visible to any superuser) for live host state: users,
workspaces, GPUs, disk usage, image storage, and idle candidates.
Root can force-stop another user’s running workspace to reclaim resources, but cannot create, own, or start a workspace and cannot edit or delete another user’s workspace. A non-root superuser has the same observation access and manages only their own workspaces and images.
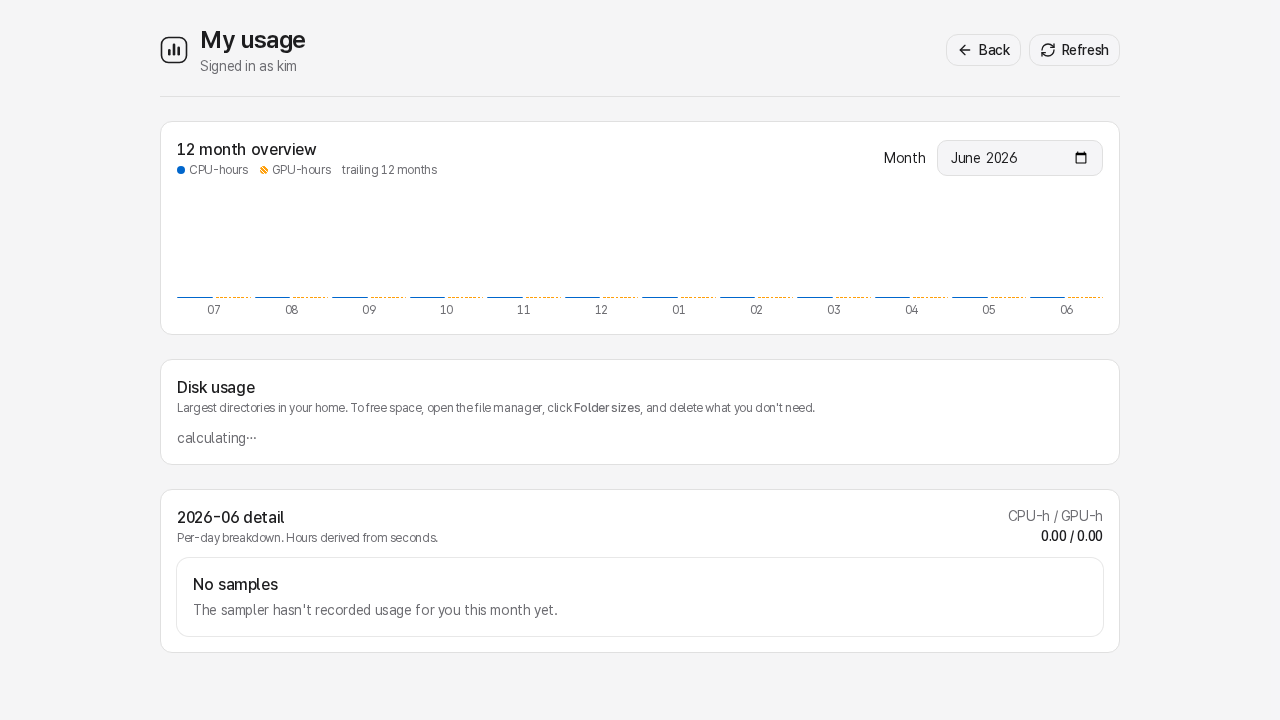
Use Usage report (/admin/usage, under People, visible to any superuser) for daily CPU/GPU
rollups and CSV exports.
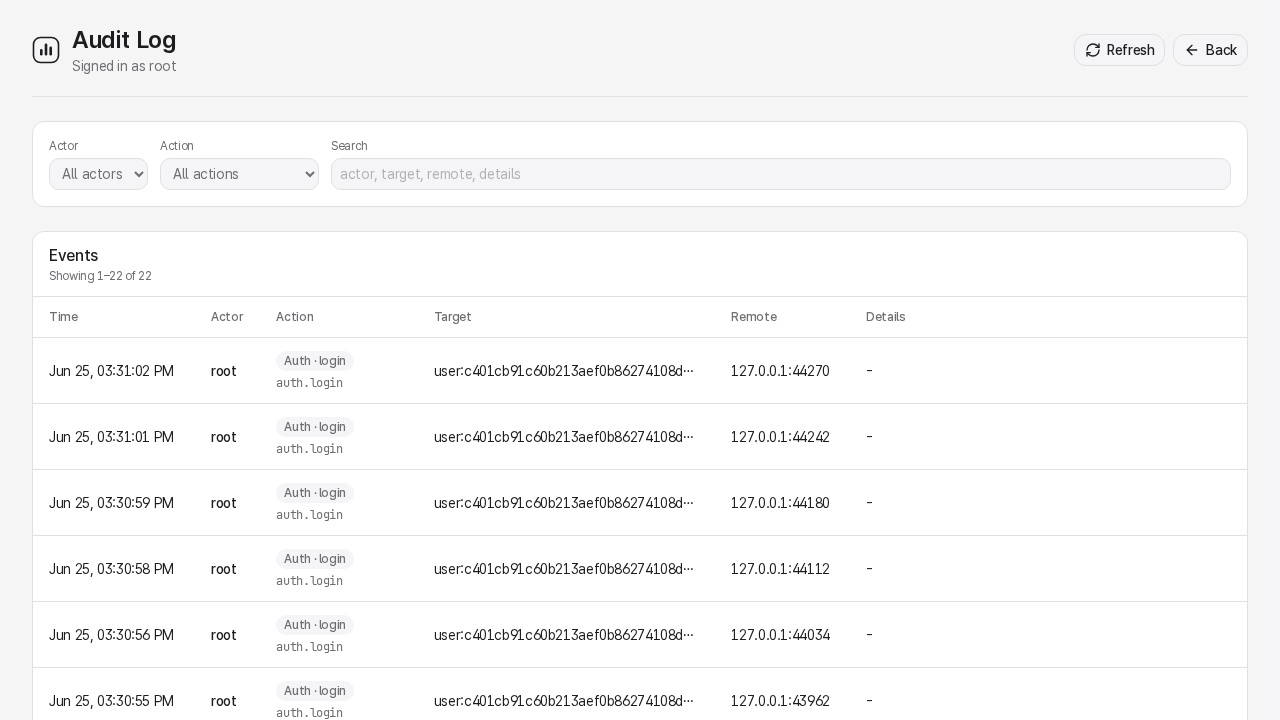
Use Audit (/admin/audit, visible to any superuser) to answer “who changed what” questions.
It records user creation, policy changes, workspace-template changes, image actions, workspace lifecycle
actions, and failed logins.
Manage licensing
Section titled “Manage licensing”Open License (/admin/license, under System) to view the current trial or signed license
(any authenticated user can view status). Only the root account can copy the activation request
or install a .lic file.
Equivalent CLI commands are:
sudo labpod admin license showsudo labpod admin license requestsudo labpod admin license verify ./license.licsudo labpod admin license install ./license.lic# Run these as rootlabpod admin license showlabpod admin license requestlabpod admin license verify ./license.liclabpod admin license install ./license.licUpdate the server
Section titled “Update the server”Open Software update (/admin/update, root-only, under System’s Maintenance links) to check
for and install a new LabPod server release. This updates the shared server that every
researcher’s browser connects to - it is a different, root-only surface from the per-user
Software update in LabPod Connect’s own Settings, which only updates that person’s desktop
client and needs no server authority (see Desktop app).
The server page shows the installed and latest version, and (when a release is available) an
Update to <tag> button; confirming it schedules the update. LabPod gives signed-in users two
minutes of warning before it starts the server update. Running workspaces, kernels, training runs,
and background processes are not stopped; open workspace pages, applications, and terminals
disconnect while the server restarts and must reconnect after it returns. While an update is
pending, a maintenance banner appears for the root admin on every page, with buttons to cancel it
or apply it immediately.
An automatic-checking toggle lets the server poll the public release endpoint every 24 hours - off by default, so an air-gapped host never reaches the network unless you turn it on, and even then it only checks the version and never installs anything by itself.