

Apps & launchers
A workspace’s detail page leads with your main app - whichever launcher or port the workspace
workspace template marks as primary - behind one state-correct button (see
Quickstart). Press it once: if the app isn’t running yet the button
reads Launch <app>, and pressing it starts the app and opens it in a new tab automatically
as soon as it’s ready - no separate Open click. Terminal and Files sit next to it as
permanent one-click shortcuts.
Every other app - a second launcher, a tool you started yourself - lives under Manage workspace → App controls, one card per launcher. A launcher is a service that runs inside the workspace. Starting or stopping a launcher does not restart the workspace or affect other launchers.
While the workspace is running, the detail page also shows two read-only summaries above that disclosure: an Apps list naming every app in the workspace with its current status, and a Resource usage row with CPU, memory, and VRAM meters when a GPU is attached. Both are there to read at a glance; the controls stay under Manage workspace.
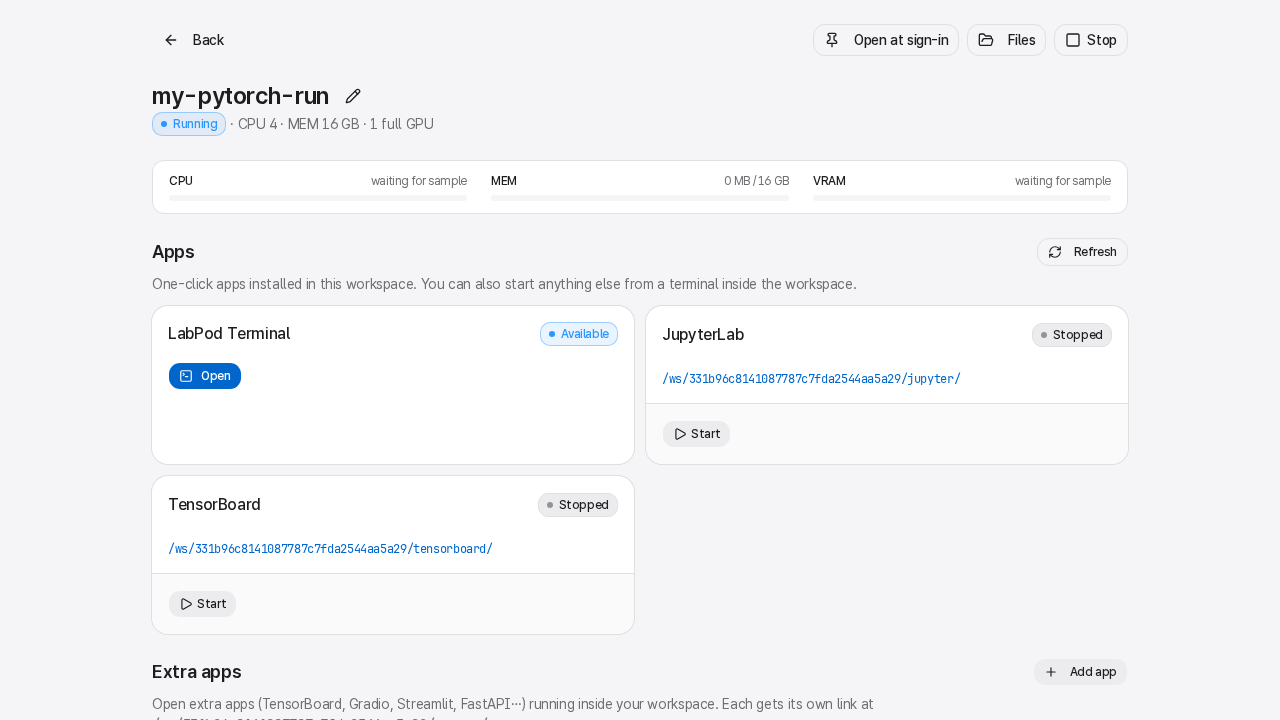
The built-in launchers
Section titled “The built-in launchers”| Launcher | What it is |
|---|---|
| LabPod Terminal | Always available - opens immediately |
| JupyterLab | Jupyter notebook and file interface |
| Code | VS Code in the browser (Open VSX or the workspace template’s configured Code app) |
| TensorBoard | Training visualization |
| MLflow | Experiment tracking UI |
Which launchers appear depends on the workspace template. The CUDA Composite workspace template includes all five; a plain PyTorch JupyterLab workspace shows JupyterLab and the terminal.
If a launcher shows not installed, it isn’t part of the workspace template you chose. Expand the “Show install command” detail for a pip/conda command you can run in the terminal to add it, or ask your admin to register a workspace template that has it pre-installed.
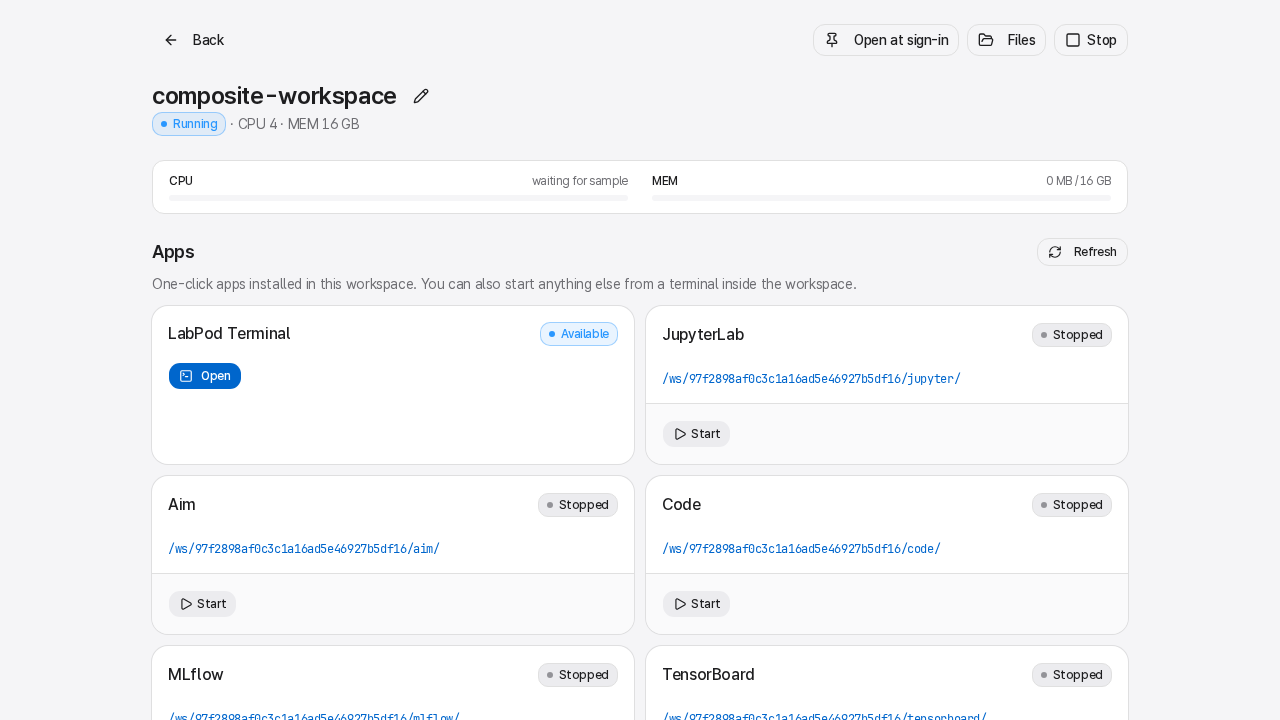
Launching a secondary launcher
Section titled “Launching a secondary launcher”Open Manage workspace → App controls and click Launch on the launcher’s card. LabPod starts the service inside the running container and waits until it responds before showing the Open button (up to 2 minutes). Once open, the app loads in a new tab.
Some launchers - for example TensorBoard - prompt for options before starting (such as the log directory). Fill in the fields and click Launch.
You can Restart or Stop a running launcher from the same card without stopping the workspace. JupyterLab and code-server cards also offer a Copy button for their access credential, in case the app itself asks for it.
Opening apps
Section titled “Opening apps”Click Open on a running launcher card to open it in a new tab. The URL uses the workspace
gateway, for example http://<host>:24681/ws/<workspace-id>/jupyter/, rather than the LabPod UI
and API origin. LabPod redirects the link there automatically.
These URLs are protected by your LabPod session cookie. They only work while the workspace is running and you are logged in. If you share a URL with a colleague, they’ll be redirected to the login page.
In LabPod Connect, workspace app navigation stays in the workstation pane for direct and SSH connections.
LabPod Terminal
Section titled “LabPod Terminal”Terminal is always available when the workspace is running - no Launch required, and it sits next to your main app on the workspace detail page rather than inside Manage workspace. Click it to get a full browser-based terminal session inside your workspace.
The terminal runs tmux inside the container, so:
- Closing the browser tab does not end the session. Reopen it and your terminal history and running processes are still there.
- If the server restarts, the terminal reconnects automatically. Its tmux session and scrollback, including blank lines, remain intact.
- You can have multiple terminal windows open at the same time; they all connect to the same session.
- Works in any workspace template that has
/bin/sh- no special image requirements.
Only the workspace owner can open its terminal. If the workspace is stopped, LabPod explains that you must start it first instead of leaving an unusable terminal screen open.
Install project environments that should be shared by your workspaces under /work, for example
/work/venvs/my-project. Do not use ~/work: workspace home is private to one workspace and the
shared work directory is mounted at /work.
Refreshing availability
Section titled “Refreshing availability”If a launcher shows an unexpected status after you’ve installed something, open Manage workspace → App controls and click Refresh. This re-probes the container to pick up changes.
If Launch reports that the application never answered its readiness check, open Show technical details. The address and HTTP status identify a wrong readiness path or proxy-prefix setting; retrying does not fix a configuration error. Follow the workspace template’s guidance or ask an administrator to correct the launcher.
Technical logs
Section titled “Technical logs”Under Manage workspace, open the Technical logs disclosure. Pick a Log source - the container itself, or one specific launcher’s captured output - then click Load logs to fetch the last N lines (100, 200, 500, or 1000; default 200). Useful for diagnosing startup failures. Click Refresh logs to pull more recent output at the same tail length.
If a launcher fails to start, its error banner offers a View app logs shortcut that opens Technical logs pre-selected to that launcher.
For tools not in the launcher list
Section titled “For tools not in the launcher list”Under Manage workspace → Extra apps, use Add app to expose services you start yourself - Gradio, Streamlit, FastAPI, a second TensorBoard instance, etc. See Extra apps & ports for the full workflow.