

How to create a global workspace template
Global workspace templates are visible to every user. Only
the root admin can create, edit, enable, disable, import, export, or delete them, from the
Workspace templates area of admin (/admin/templates).
Built-in workspace-template README previews support Markdown tables and fenced code blocks. Use fenced code for commands so operators can read and copy multi-line instructions without the preview merging them into one paragraph.
Create a workspace template from an existing image
Section titled “Create a workspace template from an existing image”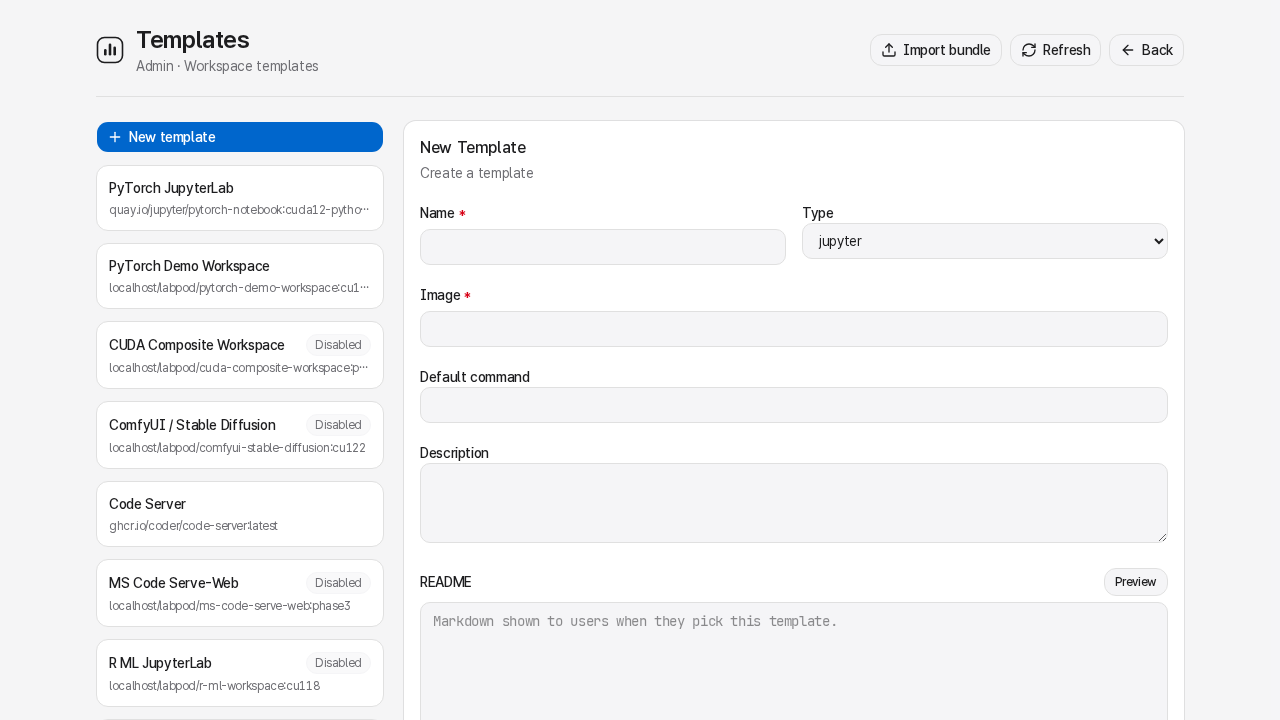
- Open Workspace templates (
/admin/templates). - Click New workspace template to open the creation form.
- Enter Name and Image. Use a fully qualified image reference with an explicit registry
host, such as
docker.io/library/python:3.11,ghcr.io/org/image:tag, ornvcr.io/.... LabPod rejects unqualified names such aspython:3.11. - Set Type, Default CPU, Default memory, and GPU defaults - these become the researcher-facing recommended resources on the composer.
- Add ports or launcher definitions.
- Prefer Import launcher for common apps.
- Use a manual port only for one-off apps.
- Keep Disabled checked until you have reviewed the definition.
- Save the workspace template.
- Return to the workspace template, uncheck Disabled, and save. Each researcher downloads the image into their own account during workspace setup.
Enabled workspace templates appear in every user’s workspace composer. If no other workspace template is marked as the default recommendation, the page prompts you to Recommend selected so new researchers have a clear starting point; a workspace template carrying that recommendation shows a Default pill and can be cleared from its detail pane.
Technical fields - image tags, commands, ports, environment, mounts, launcher behavior, and bundle details - live behind that workspace template’s Advanced toggle, separate from the CPU/memory/GPU defaults and the app/resource summary shown at the top of the detail pane.
Import a workspace template bundle
Section titled “Import a workspace template bundle”Use import when another LabPod server or user exported a .tar bundle.
- Open Workspace templates (
/admin/templates). - Click Import.
- Upload the
.tarbundle, or paste a bundle URL if the bundle is hosted somewhere the LabPod server can fetch. - Review the preview: image, ports, README, Dockerfile, and context files.
- Commit the import.
- If the bundle contains a Dockerfile, review the preserved recipe before enabling the workspace workspace template. Root does not build it; each researcher builds it in their own account during setup.
Imported Dockerfile contexts are preserved by LabPod so the bundle can be rebuilt and re-exported later.
For automation or offline handoff, a root admin can import a host-local bundle with the CLI:
sudo labpod admin template import ./template.tar --globalsudo labpod admin template import ./template.tar --owner alice# Run these as rootlabpod admin template import ./template.tar --globallabpod admin template import ./template.tar --owner aliceA --global import is created disabled so root can review it before researchers create workspaces
from it. A --owner import is created active immediately, since it belongs to that user’s own
account from the start. Use the web UI for Dockerfile-backed bundles; the CLI intentionally does
not orchestrate image builds.
Publish a Dockerfile-backed global recipe
Section titled “Publish a Dockerfile-backed global recipe”Workspace templates created from bundles or built-in managed templates can carry a Dockerfile. Root owns and reviews the global definition, but does not build a workspace image. When an enabled recipe is selected, LabPod resolves the context and output tag and builds it in that researcher’s own account.
Every external image used by FROM, Dockerfile # syntax=..., COPY --from=..., or
RUN --mount=from=... must include an explicit registry host. Bare localhost/... references are
treated as local rootless-store images; localhost:<port>/... is a registry host like any other
and must be explicit too.
- Import or create the workspace template with its Dockerfile and context.
- Review the recipe and registry sources.
- Enable the workspace template.
- Have a regular test account select it, create the workspace, and use Build image on the workspace’s own page. The resulting build and image belong only to that account.
Root cannot pull or build workspace images. To distribute one prebuilt image to several accounts, publish it to an allowed external registry; do not use an ad-hoc root build as a cache.
Add or edit launchers
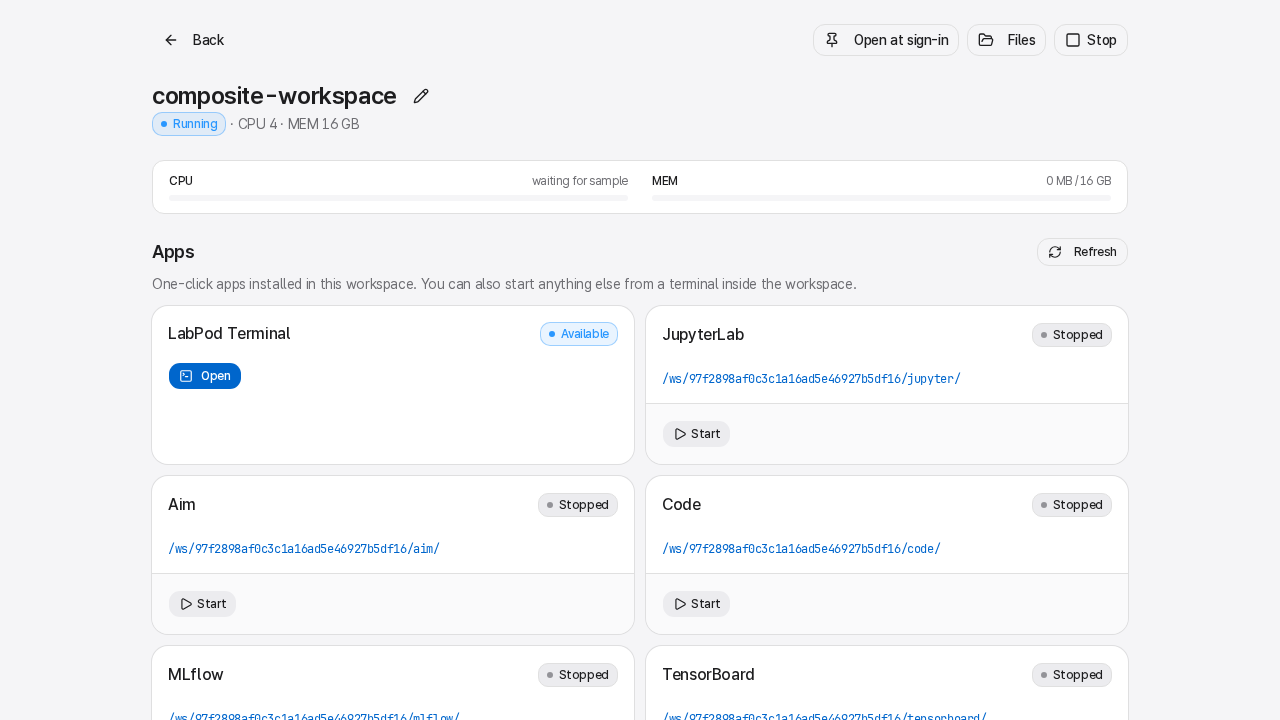
Section titled “Add or edit launchers”Launchers make apps appear under a researcher’s Manage workspace → App controls.
- Open Launchers (
/admin/launchers, also reachable from Workspace templates) and select New launcher to create a reusable launcher definition. - Open Workspace templates (
/admin/templates). - Select a workspace template and click Import launcher in the ports section.
- Pick the catalog launcher and save.
Catalog imports are snapshots. Editing Launchers later does not update existing workspace workspace templates; re-import or edit the template port when you need one to change.
Disable instead of delete
Section titled “Disable instead of delete”Disable a workspace template when you want to stop new workspaces from using it while preserving existing workspace records. Delete only when no workspaces depend on it.